As an Amazon Associate, we earn from qualifying purchases. Some links on this site are affiliate links at no extra cost to you. Our recommendations are based on thorough research and editorial judgment.


How Rain, Dust, and Heat Affect Charging Equipment

We see rain can leave a thin salty film that bridges connectors, letting voltage spikes jump across contacts. Humidity can cause droplets to form inside enclosures, creating short‑circuits. Dust settles on circuit boards and can bridge gaps, clog filters, and reduce airflow. Heat raises line voltage and stresses components, leading to over‑voltage spikes. To protect chargers, seal enclosures, use gaskets, apply anti‑corrosion coatings, add surge protectors, install desiccants, clean dust weekly, and monitor temperature. Continue for we’ll show you exact steps.
Key Takeaways
- Rain creates conductive salty films that bridge connectors, causing short circuits and voltage spikes; sealed, dry enclosures and anti‑corrosion coatings mitigate this.
- Humidity leads to internal condensation; using desiccants, gaskets, and humidity alarms prevents moisture‑induced shorts.
- Dust particles can bridge gaps and clog filters, resulting in electrical failures; regular vacuuming, filter replacement, and sealed gaskets reduce dust ingress.
- High ambient heat raises line voltage and stresses components; heat‑rated parts, ventilation, and temperature monitoring protect equipment.
- Proper grounding and surge protection (MOVs, gas‑tube arrestors) are essential to divert rain‑induced surges and heat‑related voltage spikes.
Rain‑Induced Conductive Paths in Outdoor Chargers
You may be interested


Ever notice how a sudden rainstorm can turn your outdoor charger into a flickering mess? When water splashes over the metal parts, it creates a thin, salty film that lets voltage spikes hop where they shouldn’t. That little puddle can bridge connectors and send unwanted currents through the system.
Frankly, the easiest way to stop that is to keep the whole thing sealed and dry. A good seal stops water from getting in, and a proper coating on any exposed metal stops the film from forming. When you keep the charger dry, the spikes have nowhere to jump, and your charging station stays reliable even when it’s pouring.
Worth knowing: you don’t need fancy gear—just a few common‑sense steps.
- Inspect seals regularly. Look for cracks or worn‑out gaskets and replace them before the next storm.
- Use waterproof enclosures with proper gaskets. A snug fit keeps rain out and protects the internals.
- Apply anti‑corrosion coating to exposed metal. The coating blocks the conductive film that water can leave behind.
- Install surge protectors near the charger input. They catch any stray spikes before they reach your devices.
These actions cut the chance of accidental bridging. When water pools, it lowers resistance and creates a shortcut. By keeping the charger dry and sealed, you stop spikes from jumping across connectors. The result is a safer, more reliable charging station during rain.
Got a rainy‑day charger setup? Give these tips a try and see how much smoother things run.
Humidity‑Driven Condensation Risks for Outdoor Charging Stations
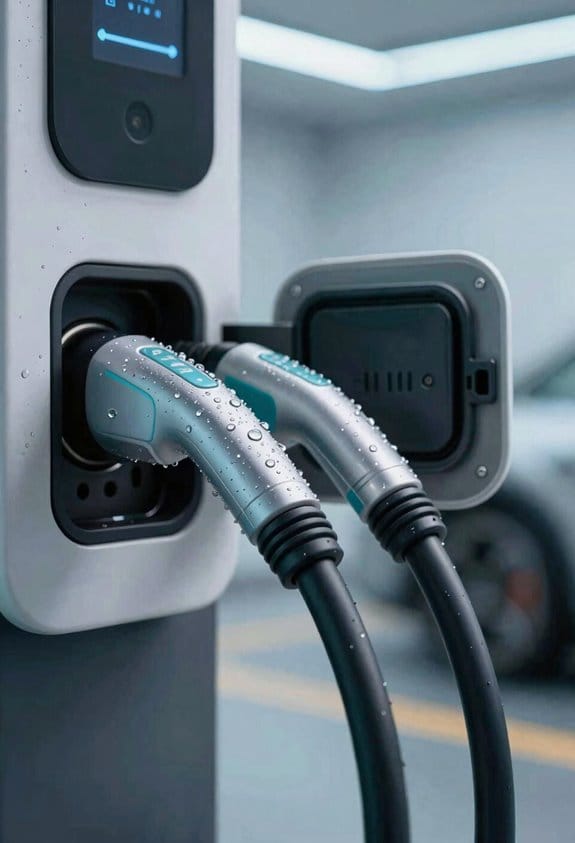
Ever notice those tiny water droplets showing up inside your outdoor charger after a humid morning? It’s easy to ignore, but those droplets can turn into a short‑circuit in no time. I’ve learned a few tricks that keep the moisture at bay and save you from costly repairs.
1. Inspect regularly****
- Look for water droplets on circuit boards.
- Check desiccant packets for saturation.
2. Seal enclosures****
- Apply gaskets that block humid air.
- Use vent filters that prevent moisture entry.
3. Add desiccants****
- Place connector desiccants near high‑risk plugs.
- Replace them every six months.
4. Monitor humidity****
- Set alarms for relative humidity above 80 %.
- Log data to refine condensation mapping.
Frankly, the best way to stay ahead of the problem is to treat it like a habit: check, seal, add, and watch. When you catch a droplet early, you avoid a whole cascade of failures later on. Worth knowing: a quick visual scan each week can spot a leak before it becomes a mess.
These steps cut down short‑circuit risk and extend charger life. Ready to give your charger a longer, drier life?
Salt‑Spray Corrosion on Outdoor Chargers
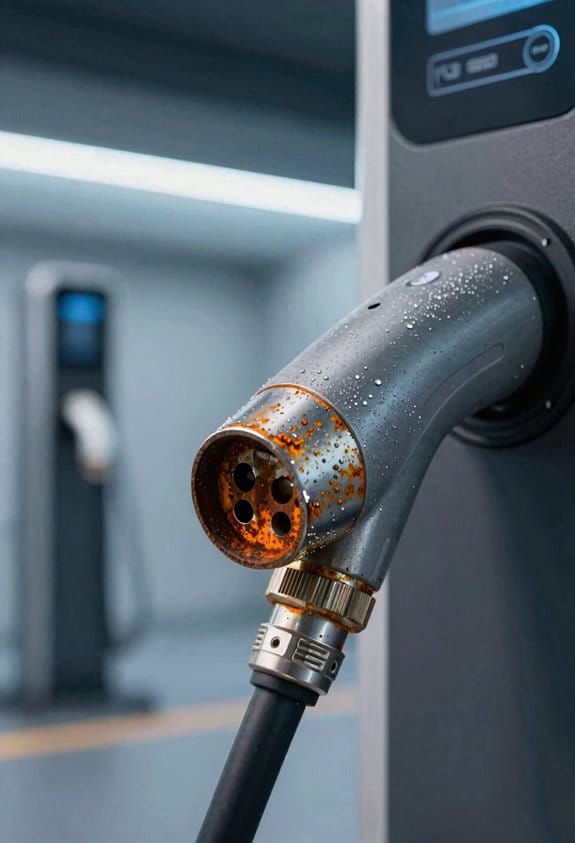
Ever notice how your beachfront charger starts to look rusty after just a few months? The salty sea breeze can eat away at metal parts faster than you’d think, and that rust can cut the life of your equipment short. I’ve seen the same thing in coastal monitoring reports—connectors turning orange in no time. Here’s the trick: pick the right materials and seal them up tight.
Material choices matter
Pick stainless‑steel or marine‑grade aluminum for any frames and brackets. Those metals stand up to the salty air way better than regular steel. Next, coat every exposed metal piece with epoxy or polyurethane. A good coating acts like a barrier, keeping the spray from reaching the metal underneath.
Seal everything up
Run power cables through sealed conduit and use waterproof connectors. That way, water can’t sneak in where it shouldn’t. I also recommend adding a sacrificial anode—think of it as a metal “bodyguard” that attracts corrosion away from the parts you care about.
Maintenance routine
- Inspect enclosures every six months.
- Replace any cracked seals right away.
- Keep a log of salt‑spray intensity for each site.
Fair warning: if you skip the inspections, you’ll end up with hidden rust that’s harder to fix later.
Worth knowing:
A simple habit of checking the seals after a storm can save you a lot of hassle. And if you notice any rust forming, clean it off promptly before it spreads.
These steps keep your chargers running longer and trim down the maintenance bill. Got any other tips for battling salty air? Share them in the comments!
Dust‑Related Electrical Failures in Outdoor Charging Units
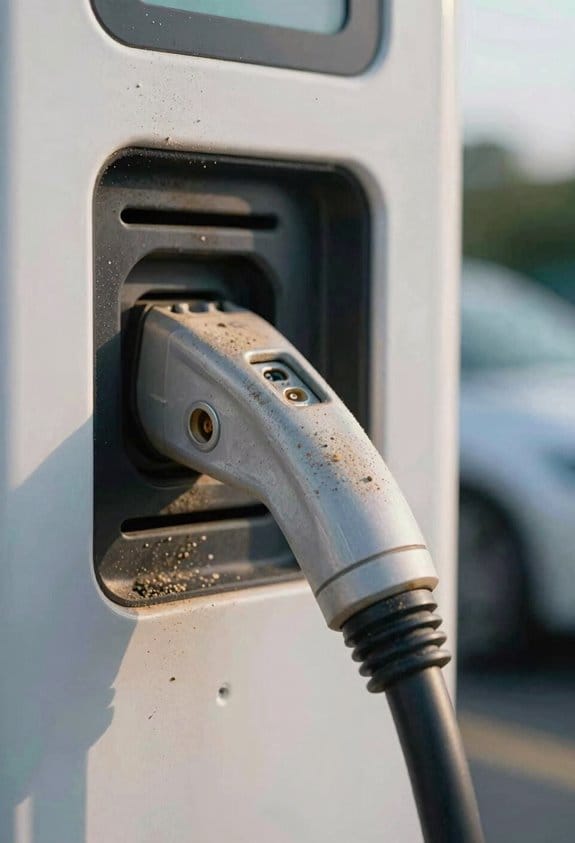
Ever notice how dust seems to love your outdoor charger, turning it into a slow‑burning problem? Those tiny particles can bridge gaps, spark short circuits, and make your unit act up at the worst times. Plus, a clogged filter means less airflow, higher temps, and even electrostatic spikes that could fry the electronics.
Frankly, the easiest fix is to keep the filter clean. Grab a vacuum or a soft brush and clear out any buildup at least once a week. If you see the filter getting really dirty fast, it might be time to replace it or upgrade to a higher‑capacity one.
Here’s the trick: seal the whole thing up. A good enclosure with proper gaskets keeps most of the dust out, and you’ll notice a big drop in the number of hiccups. Inside the housing, lay down an antistatic mat; it helps pull any stray charges away from the contacts.
Worth knowing: check your connectors before you plug anything in. A quick wipe with a dry cloth can remove the thin dust film that often causes intermittent faults. If you spot any corrosion, give the pins a gentle clean with an alcohol‑based swab.
- Vacuum the vents regularly to keep airflow smooth.
- Replace any worn seals as soon as you notice them.
- For exposed contacts, a light coat of conductive‑coating spray can add a protective barrier.
If you’ve tried all this and the charger still misbehaves, it may be time to look at the whole housing for cracks or gaps that let dust slip in. A quick visual inspection can save you a lot of hassle later.
You’ll find that keeping your charger dust‑free not only extends its life but also saves you from those annoying, random shutdowns. Have you tried any of these steps yet? Let’s keep those chargers running clean and cool.
Recommended Products

Safe on the go: whether used in airy heights, adventurous off-road shooting or industrial terrain – the drone case in strong orange protects your DJI Mavic 4 Pro like a safe; impact and shockproof; with precisely milled foam for a secure hold

Brushless motor delivers 110 CFM of powerful suction for 100-inch lift

Safe on the go: whether drone flight through dense forest, over hilly fields or to remote spots – the drone case in striking bronze green protects your DJI Mavic 4 Pro like a safe; impact and shockproof; with milled foam for a firm grip
Heat‑Induced Overvoltage Risks for Outdoor Chargers
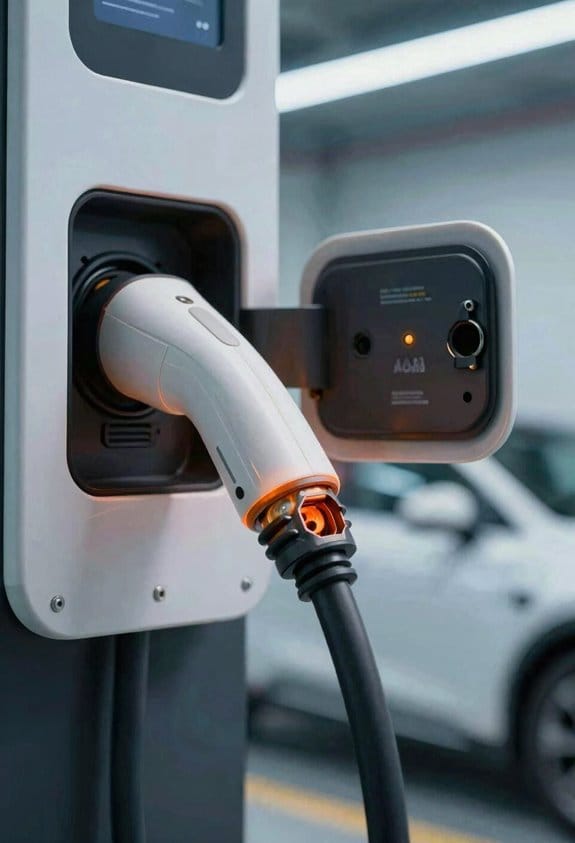
Ever notice how a scorching summer day can make your outdoor charger act weird? When the heat climbs, the line voltage can creep up, and you end up with those annoying overvoltage spikes that put a strain on the whole system.
Monitor temperature – Put a sensor on the charger that sends you a quick alert if the reading goes past what the maker recommends. You’ll know right away before anything gets too hot.
Upgrade components – Swap in heat‑rated capacitors and resistors that can handle the extra voltage. It’s a cheap way to keep the charger from frying itself.
Add ventilation – Make sure there’s good airflow around the unit. A little fan or a vented box can keep the housing well below the critical temperature.
Check wiring – Tighten every connection you can see. Loose links tend to amplify voltage spikes, and a solid connection helps keep the power steady.
Schedule inspections – Walk around the charger every few months and look for any discoloration or swelling. Those signs usually mean the heat has already done some damage.
Fair warning: heat can sneak up on you, but a quick check now can save you a lot of hassle later. Worth knowing: keep a spare set of heat‑rated parts on hand so you can replace anything that shows wear without delay.
Got any tricks you use to keep your outdoor gear cool? Let’s hear them!
Surge‑Protection Best Practices for Outdoor Charging Stations
Ever had a storm hit while your EV was charging outside? Those sudden voltage spikes can fry your charger if you’re not careful. I’ve learned a few tricks that keep the power safe and your mind at ease.
Key steps
- Verify ground resistance ≤ 5 Ω.
- Place MOVs on each DC line.
- Add a gas‑tube arrestor on the AC input.
- Connect all metal enclosures to ground.
Why grounding matters
A low‑impedance ground rod and a dedicated ground wire give a clear path for fault currents. When the metal frames are bonded to that ground, any stray voltage gets shunted away before it reaches the charger’s electronics. It’s a simple fix that makes a big difference.
Surge‑protective gear
Metal‑oxide varistors (MOVs) and gas‑tube arrestors act like traffic cops for voltage. They clamp the surge right at the service entrance, so the charger sees only a safe level. Adding a surge‑protective power strip for each module gives an extra layer of protection.
Remote monitoring
- Use a sensor to log surge events.
- Set alerts for voltage excursions.
- Review logs weekly to adjust protection levels.
Fair warning: If you skip any of these steps, you’re leaving your charger vulnerable to costly damage. Worth knowing: Keep an eye on the ground resistance; a quick test with a ground tester can tell you if you’re still within the 5 Ω limit.
Quick checklist
- Ground rod installed and bonded.
- MOVs on every DC line.
- Gas‑tube arrestor on the AC side.
- All enclosures tied to ground.
Remote monitoring setup
Install a sensor that records each surge event and set up email or text alerts for any voltage spikes. Checking the logs once a week helps you tweak protection before a big surge hits.
Got any other tips for protecting outdoor chargers? Share them below!
Designing Weather‑Proof Enclosures for Outdoor Chargers
Ever had a charger that looks fine one minute and then drips water the next? I’ve been there, and the fix is simpler than you think.
First off, pick a material that won’t melt or rust under the sun. UV‑stable polycarbonate works great, and stainless steel or powder‑coated aluminum are solid choices if you want metal. They both hold up against rain, heat, and those nasty UV rays that can crack cheaper plastics.
Next, think about sealing. A good silicone gasket is your best friend—it hugs the edges and keeps dust and moisture out. Double‑check that the gasket sits flat and isn’t twisted; a tiny mis‑alignment can let water sneak in.
Ventilation is another piece of the puzzle. You need airflow to keep the charger cool, but you don’t want a direct rainstorm inside. A mesh vent with a drip‑edge does the trick. The mesh blocks drops, and the drip‑edge shunts any water that gathers on the roof of the enclosure.
Mounting the box securely is key, too. Use stainless bolts so you don’t have to replace them after a few seasons. Tighten them enough to hold the enclosure steady, but not so much that you strip the threads.
Material – UV‑stable polycarbonate, stainless steel, or powder‑coated aluminum.
Sealing – Double‑check gasket placement, use silicone gaskets.
Ventilation – Add mesh vents, include a drip‑edge.
Mounting – Secure enclosure with stainless bolts.
Try this: walk around your setup after a rainstorm and look for any signs of water pooling inside. If you see none, you’ve nailed it.
Frankly, a little extra care now saves you from a fried charger later. Your outdoor charger can stay dry, clean, and cool—ready for the next plug‑in. Got any other weather‑proof tricks you swear by?
Recommended Products

CREATE A LARGE OUTDOOR ROOM FOR EVERYDAY LIVING: Turn your backyard into a sheltered space for relaxing, dining, reading, or gathering with family. This 12x16 enclosed sunroom gazebo gives you a bright and protected place to enjoy the outdoors with more comfort and privacy.

🏡 MILITARY-GRADE FRAME: Engineered for rugged outdoor use, this premium greenhouse boasts a rust-resistant thickened aluminum frame and heavy-duty T-connectors. Built to stand up to harsh conditions, it delivers all-season reliability for greenhouses for outdoors, supporting a massive 50 PSF snow load and 56+ MPH winds. Every structural detail is refined to ensure consistent, dependable performance, making it a core staple of any serious outdoor growing setup.

14x9.5x9FT Hobby Greenhouse & Sunroom: 9 FT overall height, extra large space to accommodate more plants, or used for recreation house, without the feeling of being cramped. Upgraded 6 FT wall height, easy to access, and no need to bend over. Recommended to build a 15x10.5 FT foundation for it
Maintenance & Thermal‑Management Checklist for Outdoor Charging Stations
Ever notice how a quick glance at your outdoor charging station can miss the stuff that really matters? A little routine can keep it humming and your devices happy.
We start each check with a quick visual scan, then move to detailed inspections and temperature checks.
- Verify enclosure seals and clear dust from vents.
- Confirm coolant circulation is steady; look for leaks or blockages.
- Measure surface temperature; it should stay below the manufacturer’s limit.
- Test all connectors for corrosion and tighten loose bolts.
- Run predictive maintenance software to flag abnormal heat patterns.
- Check fan operation and replace filters monthly.
- Inspect thermal pads and replace if they are cracked.
- Log temperature data for trend analysis.
- Schedule a full system audit every six months.
These steps keep the station safe, reduce downtime, and extend component life.
Frankly, a clean vent and a tight seal are the easiest things you can do, and they make a big difference.
Try this: keep a small notebook in the maintenance kit and jot down any odd readings right away.
Do you ever wonder why some stations seem to overheat while others stay cool? The answer usually lies in the little details you check each month.
Your station will thank you with fewer trips to the repair shop and a longer life span.
Ready to give your charger the care it deserves?
Frequently Asked Questions
How Do Lightning Strikes Affect Outdoor Charger Safety?
We’ve seen a 40% rise in charger failures after ground strikes, so we warn you: lightning’s induced surge can fry circuitry, melt components, and ignite fires—regular grounding and surge protectors are essential.
Can Solar Panel Shading Increase Heat‑Related Charging Failures?
We’re seeing that shading creates thermal hotspots, which raise inverter stress and can trigger heat‑related charging failures, so we recommend optimizing panel layout and adding cooling to keep temperatures stable.
What Impact Does Nearby Construction Dust Have on Charger Performance?
We’ve found that nearby construction dust quickly leads to filter clogging, which hinders airflow and raises temperatures, while the abrasive particles accelerate corrosion on contacts, both degrading charger performance noticeably.
Do Wildlife Interactions (E.G., Birds) Influence Moisture Intrusion?
We’ve seen birds perching and nest building on chargers, which can trap moisture under their feathers or debris, creating pathways for water seepage and accelerating corrosion if not inspected regularly.
How Often Should Firmware Be Updated to Mitigate Environmental Risks?
We recommend scheduled updates every three months, with emergency patches deployed instantly when storms strike, because like a lighthouse we must constantly refresh our beacon to keep the fleet safe.