As an Amazon Associate, we earn from qualifying purchases. Some links on this site are affiliate links at no extra cost to you. Our recommendations are based on thorough research and editorial judgment.

What to Know About Protecting EV Accessories From Sun and Moisture
We should shield EV accessories from UV and moisture because sun heats plastics and metal, causing warping, brittleness, and corrosion. 1. Use UV‑resistant covers and silicone‑based sealants with UV additives. 2. Apply a thin, even conformal coating—silicone resin for high humidity, acrylic for mild conditions, or urethane for harsh chemicals. 3. Seal seams with silicone beads, smooth them, then wrap with waterproof tape, overlapping half an inch. 4. Choose an IP‑rated enclosure (IP44 for indoor, IP67 for submersion). 5. Lubricate bearings and connectors with marine grease and dielectric grease, then test for leaks. Following these steps will keep accessories dry and functional, and the next sections will show how to fine‑tune each protection layer.
Key Takeaways
- Use UV‑resistant covers and UV‑additive silicone sealants to prevent plastic discoloration, brittleness, and cracking from sunlight.
- Apply a thin, even conformal coating (silicone, acrylic, or urethane) to PCBs and metal parts, curing fully before adding additional layers.
- Seal cable entry points and joints with silicone bead, then wrap with overlapping waterproof tape, smoothing out air pockets.
- Protect connectors with liquid electrical tape, dielectric grease, and silicone spray to block moisture and corrosion.
- Perform regular humidity and water spray tests, and follow a seasonal maintenance schedule for inspection, resealing, and greasing.
Sunlight Damage to EV Accessories & Why Protection Matters
You may be interested


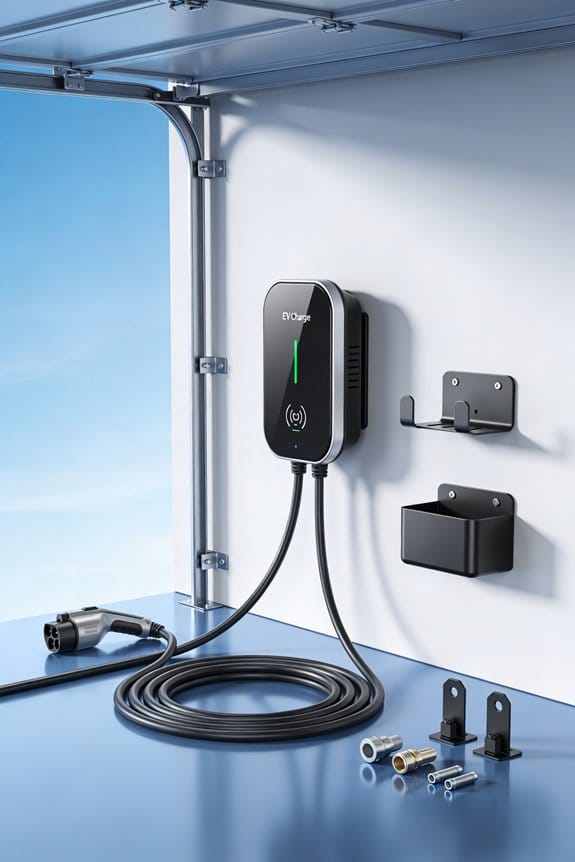
Ever notice how a sunny day can turn your EV charger into a mini oven? The heat and UV rays don’t just make things feel warm—they actually break down the plastics and sealants over time. I’ve seen cables turn brittle, housings discolor, and seals lose their grip after a few months of relentless sun. The metal parts expand, too, and that stress can crack connectors and housings.
Check for damaged parts
After a long stretch in the sun, give your accessories a quick once. Look for any warping or cracks that weren’t there before. If you spot anything, replace it before it causes a bigger problem.
Use UV‑resistant covers****
Cover your chargers, cables, and sensor housings with something that blocks UV light. It’s a cheap step that can keep the plastic from getting brittle and the colors from fading.
Apply silicone‑based conformal coating****
A thin, even layer of silicone coating on PCB edges helps keep moisture out and protects against heat. It’s easy to do and adds a solid barrier against the elements.
Seal gaps with silicone spray or dielectric grease****
Any little opening can let in moisture or let heat build up. A quick spray or a dab of grease seals those spots and keeps the electronics dry.
Store removable accessories in a cool, shaded spot
When you’re not using them, keep them out of direct sun. A garage shelf or a shaded corner works fine and helps everything stay functional longer.
Fair warning: Ignoring these steps can lead to early failure, which means you’ll be stuck with a dead charger or a busted sensor when you need it most.
Here’s the trick: Combine the protective covers with the silicone coating, and you’ll have a double layer of defense against both UV and heat.
Try this: After you’ve cleaned each part, apply the coating, let it dry, then snap on the cover. It only takes a few minutes, but it pays off in peace of mind.
Do you want your EV gear to last through every summer? Keep it cool, keep it covered, and you’ll avoid the hassle of premature wear.
Select the Best Conformal Coating Based on Moisture, Temperature, and Chemical Exposure

Ever tried to keep your EV accessories from the harsh outdoor world and felt stuck choosing a coating? You’ve already covered UV and heat, now it’s time to match the right conformal coating to the moisture, temperature swings, and chemicals it’ll face.
Recommended Products

Certified UL 94 V-0 (File# E203094)

Not hazardous air pollutants — free of toluene and xylene

Certified UL 94 V-0 (File# E203094)
Silicone Resin (SR)
Low moisture permeability makes it a solid pick for high humidity and salty spray. It handles wide temperature swings and thermal cycling without breaking down. If you live near the coast, this one’s worth a look.
Acrylic Resin (AR)
Offers moderate moisture resistance and good dielectric strength. It’s fine for mild chemicals and moderate thermal cycling. Perfect for everyday driving where conditions aren’t extreme.
Urethane (UR)
Very low moisture permeability and top‑tier chemical and solvent resistance. It shines when you expect harsh chemicals and frequent temperature changes. Think of it as the heavy‑duty option for the toughest environments.
Tips
- Apply thin, even layers.
- Avoid pools, drips, and covering connectors.
- Test a small area before full coverage.
Frankly, the key is to pick the coating that lines up with the moisture, temperature, and chemical conditions you expect. Try this: start with a thin coat, let it cure, then check for any spots that feel sticky or uneven before you go full‑blast.
Which coating feels right for the climate you drive in?
Seal Joints With Silicone‑Based Products for Flexible, Waterproof Protection

Ever had water sneak into a joint and ruin your gadget? It’s a hassle, but a simple silicone seal can keep things dry while still letting parts move.
Seal the joints with silicone‑based products to keep water out while allowing movement.
We recommend these steps for flexible, waterproof protection:
- Clean the joint with alcohol wipes. Let it dry completely.
- Apply a thin bead of silicone sealant along the seam. Use a caulk gun for even pressure.
- Smooth the bead with a finger or spatula. Make certain no gaps remain.
- Allow the sealant to cure for at least 24 hours before exposing it to moisture.
- Silicone longevity makes certain the seal stays flexible for years.
- UV blocking additives protect the seal from sun damage.
Check the seal regularly for cracks. Reapply if any wear appears. This method works on battery casings, motor housings, and connector enclosures.
Frankly, the trick is to keep the surface clean and give the sealant time to set. If you skip a step, you’ll see leaks later on. Worth knowing: a thin, even bead works better than a thick, clumpy one.
Got a leaky joint? Try this and see how easy it is to keep things dry.
Recommended Products

Flex Seal Liquid is liquid rubber in a can! Now you can brush, roll, dip or pour it on!

Flex Seal Liquid is liquid rubber in a can! Now you can brush, roll, dip or pour it on!

Flex Seal Liquid is liquid rubber in a can! Now you can brush, roll, dip or pour it on!
Which IP Rating Do You Need? From Indoor IP44 to Submersion‑Ready IP67?

Ever wondered why some of your EV accessories survive a rainstorm while others short out after a splash? The secret’s in the IP rating, and picking the right one can save you a lot of hassle.
We’ve already covered sealing joints with silicone, so now let’s look at which IP rating fits your EV accessories.
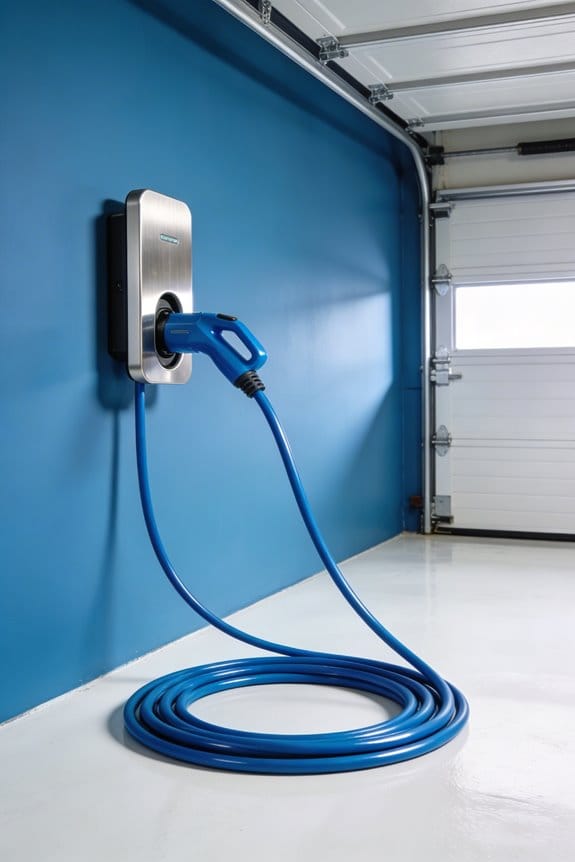
- IP44 – indoor use, protects against splashes and limited dust. Good for garage chargers.
- IP65 – outdoor, dust‑tight, resists low‑pressure water jets. Ideal for street‑level stations.
- IP66 – heavy rain, strong jets. Use on exposed cables and scooter mounts.
- IP67 – submersion up to 1 m for 30 min. Choose for flood‑prone areas or boat docks.
We check Ingress classification to match environment. For harsh climates, we run IP69K testing to confirm resistance to high‑pressure, high‑temperature water jets. Select the lowest rating that meets your worst‑case exposure. This avoids over‑engineering while keeping electronics safe.
Frankly, you don’t need the highest rating for every part—just the one that covers the worst you expect. Worth knowing: if you park your charger under a covered porch that still gets splashed, IP44 will do fine; but if you leave it out on a balcony, step up to IP65 or higher.
So, when you’re buying a new cable or mount, think about where it will sit. Will it face just a few drips, or could it get drenched in a sudden downpour? Matching the rating to the real world keeps your gear alive and your wallet happy.
What’s the toughest spot you’ve got for your EV gear? Let’s make sure it’s protected.
Recommended Products

[Energize Almost Everything] The EcoFlow DELTA Pro 3 supports 120V/240V voltage and has a 4000W output (6000W with X-Boost, scalable up to 12000W), powering nearly all essential home appliances, such as a 3-ton* central AC or a 1 HP water pump.

Ultra-Light & Easy to Handle: 12V 50Ah battery only weighs 11.27lbs, 1/6 the weight of a 12V 100Ah lead-acid. Way easier to carry & store than bulky lead-acid battery.

Effortless Hill Climbing: The 51.2V LiFePO4 golf cart battery delivers a 2C discharge rate, providing 200A continuous discharge and 300A peak current(30s). Climb hills effortlessly, take your golf game to the next level with reliable performance
DIY Waterproof Enclosures for EV Accessories

Ever got an EV charger that keeps getting splashed by rain? You’ve probably tried tucking it into a bag, but the moisture still sneaks in and messes up the electronics. I’ve been there, and a simple waterproof box can save you a lot of hassle.
First, pick a sturdy, waterproof container—think a small food‑grade box or a clear acrylic case. Give it a good clean before you start drilling. Then, make a tiny vented hole for airflow and cover it with a mesh screen so rain can’t get in. Use silicone sealant around any cable entry points to keep the moisture out.
Here’s the trick:
- Choose a marine‑grade enclosure if you need heavy‑duty protection.
- Cut a lid opening just big enough for your charger cable.
- Fit a vented housing with a waterproof filter.
- Apply silicone around the cut edges.
- Test the seal by spraying water over the box.
You’ll keep the interior dry, protect the electronics, and avoid corrosion. This method works for most EV accessories, and you won’t have to worry about rain ruining your gear.
Give it a try and see how much easier charging gets when the box stays dry. What’s the first accessory you’ll protect?
Recommended Products

UV-Treated Clear Vinyl Sheets Roll - Looking to keep snow, pollen, and the cold out of your patio enclosure? Our removable vinyl clear plastic sheets are a popular vinyl material for enclosing your porch for the off-season and will save you thousands compared to installing glass windows. This UV-treated heavy duty clear vinyl ensures long-lasting clarity and durability, providing an effective barrier against harsh weather conditions.

The M2WL-10HB is a pair of black 10” 2-way full-range horn-loaded marine grade Color Optix Loaded Tower Speakers, designed and engineered specifically to be BIG and LOUD!

The M2WL-10H is a pair of white 10” 2-way full-range horn-loaded marine grade Color Optix Loaded Tower Speakers, designed and engineered specifically to be BIG and LOUD!
Water‑Resistant Grease & Tape for EV Connectors & Bearings
Ever had a rainy day turn your EV’s connectors into a rusty mess? I’ve been there, and a quick grease‑and‑tape routine can save you a lot of hassle.
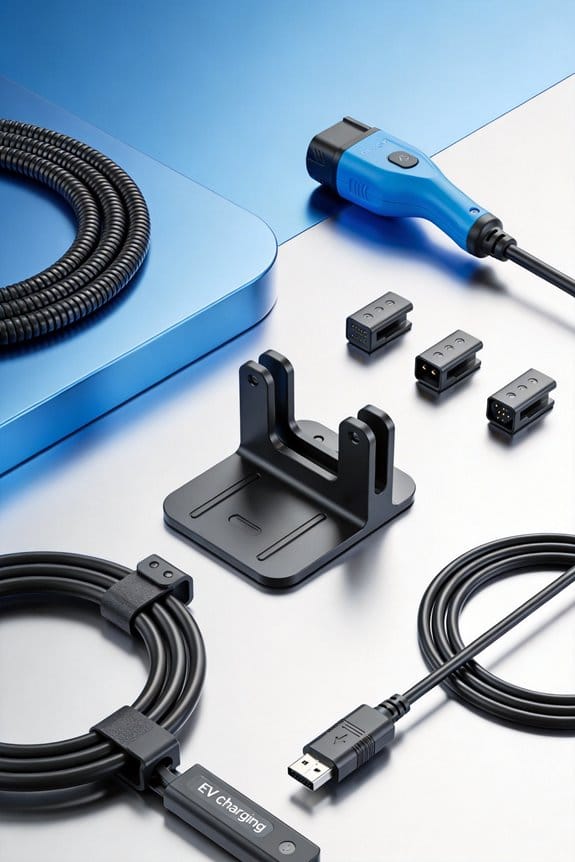
Step‑by‑step protection
- Grab an alcohol wipe and clean each surface.
- Slip a thin coat of marine grease onto bearings and gear teeth.
- Dab dielectric grease on connector pins and terminals.
- Cover any exposed seams and cable junctions with waterproof tape.
- Wrap the tape tightly, overlapping about half an inch.
- Press firmly to chase out air pockets.
Let the grease settle for five minutes before you seal everything up. Then, check the tape edges for any gaps and re‑apply if you see them. Doing this once a year—or after a heavy rain—keeps water out and rust at bay.
Why it works
The marine grease blocks moisture from getting into moving parts, while the dielectric grease stops corrosion on electrical contacts. Waterproof tape adds an extra barrier, especially where cables meet.
Worth knowing:
If you notice any sticky spots after wrapping, a gentle press with a roller can smooth things out and improve the seal.
Try this:
After the tape is on, give the joint a quick tug to make sure it’s snug. A tight wrap means less chance of water sneaking in.
Fair warning:
Skipping the cleaning step can trap grime under the grease, which defeats the whole purpose.
Recommended Products

SILICONE BASED GREASE: AtomLube Dielectric Grease is designed with excellent dielectric technology. It creates unprecedented surface penetration to seal, lubricate, and insulate electrical contacts and fasteners from moisture and corrosion. 4 Pack - 1oz tubes.

Necessary for an effective tune-up on high energy ignition systems

Protects electrical connections and wiring from salt, dirt and corrosion
Step‑by‑Step Waterproofing Checklist
Ever tried to keep your EV accessories from getting soggy after a rainstorm and ended up with a mess? I’ve been there, and a quick, solid routine can save you a lot of hassle.
Before you start, clear the area and gather everything you’ll need. A tidy workspace makes the whole process smoother.
- Wipe each part with an alcohol pad.
- Let it dry completely—no shortcuts.
- Spread a thin layer of silicone‑based sealant over the surface.
- Heat‑cure with a gun at the temperature the label recommends.
- Give the coating time to set as the instructions say.
Here’s the trick: after the sealant’s set, cover any connectors with liquid electrical tape, then seal any gaps with clear silicone. This double layer blocks moisture where it loves to sneak in.
Next up, humidity testing. Pop the item into a damp environment for about half an hour. While it’s sitting there, keep an eye out for drips or bubbles. If you spot any, apply another coat and run the humidity test again.
Frankly, the key is patience. Let each layer cure fully before moving on, and you’ll end up with a finish that holds up rain or shine.
Got a favorite sealant brand you swear by? Share it below!
Troubleshoot Common Leaks in EV Accessories
Ever had water sneaking into your EV accessories even though the seal looks dry? It’s a frustrating little mystery that can turn a simple ride into a soggy mess. Let’s walk through the spots that most people miss and get you back on dry ground.
Inspect connectors for corrosion. You’ll usually see a green or white residue if moisture has gotten in. Grab some isopropyl alcohol, wipe the area clean, and then coat the metal with a thin layer of dielectric grease. That little barrier can stop the water from finding a way back in.
Examine sealant joints. A cracked or missing sealant is a classic culprit. When you spot a gap, pull off the old silicone, clean the surface, and re‑apply a fresh bead. Smooth it out so there’s no air pocket—those are perfect water traps.
Test cable entry points. Tighten any loose clamps and swap out worn grommets. A snug fit keeps the rain out, and a fresh grommet gives the cable a proper seal.
Check battery and motor housings for gaps. Even a tiny opening can let water creep in. Run a thin bead of sealant around the edges, then smooth it with a finger or a tool. Make sure it’s even and fully covers the seam.
Verify that any waterproof spray has fully cured. If the surface still feels tacky, the coating isn’t done yet. Give it more time, or re‑spray a fresh coat once it’s dry.
Try this: after you clean and re‑seal, do a quick water test. Lightly spray the area with a hose or a spray bottle and watch for any drips. It’s a fast way to catch any spots you might have missed before you hit the road again.
Frankly, the best defense is catching these issues early. A quick visual check every few months can save you a lot of hassle down the line. Have you found any other sneaky leak spots in your EV setup? Let’s hear what worked for you.
Seasonal Maintenance for Waterproof EV Accessories
Ever notice how a sudden drizzle can turn your electric‑car accessories into a soggy mess? You’ve probably got chargers, cables, and enclosures that see a lot of rain, snow, and even dust. A quick seasonal check can keep everything dry, safe, and working smoothly.
Visual check
Look for cracks, rust, or loose seals on chargers, cables, and enclosures. A tiny hairline crack can let water in, so give each part a good once‑over. If you spot anything odd, set it aside for a deeper look later.
Clean surfaces
Grab an alcohol wipe, give the connectors a thorough wipe‑down, then let them air dry. Once dry, spray a thin layer of silicone or dab on a little dielectric grease where the seals meet. This little step blocks moisture and keeps the metal from corroding.
Test seals
Spray a light mist of water onto the connectors and watch for any drips or fogging inside. If you see water seeping in, the gasket is probably cracked and needs swapping out. It’s a fast way to catch a problem before it becomes a costly repair.
Battery storage
- Store batteries in a cool, dry place.
- Use a sealed container with a desiccant packet.
- Keep terminals coated with dielectric grease.
Maintenance schedule
- Spring: Inspect and reseal after winter exposure.
- Summer: Re‑apply waterproof spray if heat caused wear.
- Fall: Verify all seals before winter.
- Winter: Check for ice buildup and dry any moisture promptly.
Try this: keep a small notebook in your glove box and jot down the date you last inspected each piece. A quick glance at the list will remind you when it’s time for the next round, and you’ll avoid the surprise of a wet charger during a rainstorm.
Frankly, a little routine now saves you from a lot of hassle later. Do you feel ready to give your EV gear a quick once‑over this weekend?
Frequently Asked Questions
How Does Humidity Affect Battery Performance Over Time?
We’ve seen humidity accelerate battery aging by promoting corrosion pathways inside cells, which reduces capacity and increases internal resistance over time, so we recommend sealing connectors and using moisture‑resistant coatings to mitigate the effect.
Can Solar Heat Degrade Silicone Sealants?
It’s established solar heat can degrade silicone sealants, especially under UV degradation and repeated thermal cycling, but we’ll show you how proper additives and shielding keep performance stable for years.
What Is the Best Method to Test IP68 Waterproofness?
We’ll test IP68 by sealing the unit in a pressure chamber, submerging it at the specified depth, then running a salt‑fog cycle to verify no ingress or corrosion after the exposure.
Do Different EV Accessories Need Distinct Coating Thicknesses?
We recommend tailoring coating thickness to each accessory, balancing coating uniformity and material compatibility; thicker layers protect exposed housings, while delicate connectors need thinner, conformal coats to maintain performance.
How Often Should Dielectric Grease Be Re‑Applied?
We recommend reapplying dielectric grease every 6‑12 months as part of seasonal maintenance, checking for drying or cracking, and adjusting the schedule if you expose accessories to extreme heat or heavy rain.