As an Amazon Associate, we earn from qualifying purchases. Some links on this site are affiliate links at no extra cost to you. Our recommendations are based on thorough research and editorial judgment.


What EV Owners Should Know About Charging Cable Wear

We should check cables often for cracks, fraying, or worn spots, because bending and UV exposure weaken the outer jacket and expose the wires. Heat and frequent plug‑unplug cycles cause expansion, contraction, and connector fatigue, so we avoid rapid temperature changes and limit unplugging. Store cables dry, use a protective sleeve, and keep a slack length to prevent tight pulls. Choose reinforced polymer or Kevlar‑braided cables with cut‑resistance test data, and lock them securely to deter theft. A quick inspection routine will catch issues early and keep charging reliable, and the next section shows how to maintain your cable.
Key Takeaways
- Inspect cables weekly for cracks, fraying, or worn spots; replace immediately if damage is visible.
- Use reinforced outer layers (polymer, stainless‑steel braid, or Kevlar) to resist cuts, UV, and temperature‑induced fatigue.
- Limit plug‑unplug cycles and avoid rapid temperature changes to reduce connector wear and insulation cracking.
- Choose appropriate cable length (5–10 m) with slack, store it loosely in a dry, stable environment, and avoid sharp bends.
- Secure cables with locks or ID markings, and keep warranty and serial‑number records to mitigate theft and facilitate replacement.
What Mechanical Damage and Weathering Do to Your EV Charging Cable
You may be interested



Ever noticed how your EV charging cable starts looking a bit worse for wear after a few months? It’s not just the occasional scuff—mechanical stress and weather can really chew it up. Cracks and fraying show up when the cable gets bent or pulled too hard, and the sun’s UV rays can weaken the outer jacket and corrode the insulation. Those things make the cable less flexible and raise the risk of a break.
Inspect the cable weekly.
Look for visible cracks, cuts, or worn spots.
Check the plug for looseness.
Store the cable away from direct sunlight.
Avoid dragging the cable over rough surfaces.
When any of those signs appear, swap the cable out right away. A protective sleeve can slow down material fatigue and keep UV rays at bay. Keep the cable clean and dry to fend off weather‑related damage. This routine helps keep your charging performance steady.
Worth knowing:
- Give the cable a quick visual check before each charge.
- If you see any fraying, stop using it and replace it.
- A simple sleeve can add a lot of life to the cable.
Frankly, a little extra care now saves you from a sudden charger failure later. You’ll wonder why you ever ignored it.
Got any other tips for keeping your EV gear in top shape?
Recommended Products

【All-Weather Protection】This durable charging station box is built with high-quality materials to withstand rain, snow, heat, and storms, keeping your wall connector safe year-round.

► SAFETY - A charging cable left on the ground poses significant risks to the user, their family, and pedestrians, leading to trips, falls, and, even more concerning, the risk of electrocution due to cable damage (from heavy or sharp objects, pets, rodents and wear over time, and especially contact with water or rain). The Barkan wall arm protects against these hazards by lifting the cable above head height, concealing most of it inside the mount and shielding it from potential damage.
Why Temperature Swings and Frequent Plug‑Unplugging Accelerate Cable Failure
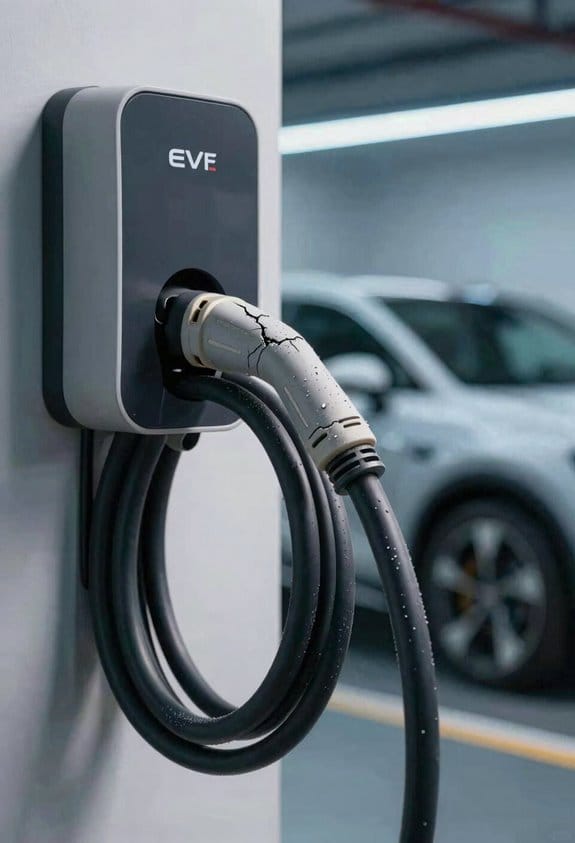
Ever notice how your charging cable seems to die right after a long day in the sun? Those temperature swings and the constant plugging and unplugging are doing more damage than you think. When the heat hits the metal and plastic, they expand, then contract as they cool, and every time you yank the plug out, the pins get a little more tired. Over weeks and months, the insulation cracks and the connector starts to wobble, leading to a weak, flaky connection.
Frankly, the easiest way to keep your cable alive is to treat it like you would a car’s tires—avoid harsh conditions and give it a break when it needs one. If you leave it in a hot car or a sun‑baked porch, the material expands and contracts, and the repeated plug‑unplug actions stress the connections. These changes cause thermal cycling that weakens the metal and plastic. Over time the plug’s pins develop connector fatigue, and the cable’s insulation cracks.
Here’s the trick: make a habit of keeping the cable out of extreme heat and limit how often you pull it out of the wall. A few simple habits can add years to its life without any fancy tech.
- Limit exposure – park in shade or garage when possible.
- Avoid rapid temperature changes – let the cable warm up before unplugging.
- Reduce plug‑unplug frequency – keep the charger attached for full sessions.
- Check for looseness – tighten any wobbling plugs promptly.
Worth knowing: when you notice a loose plug, it’s a sign the metal is already fatigued. Give it a quick tighten or replace the cable before the problem spreads. A snug connection means less movement, which translates to less wear on both the pins and the insulation.
If you’re already dealing with a frayed cord, don’t panic. Give it a gentle tug to see if any part feels loose, and consider swapping it out for a new one that’s rated for higher temperatures. A little extra care now can save you from a sudden loss of power later on.
How to Spot Cracks, Fraying, Loose Plugs, and Ice Blockages
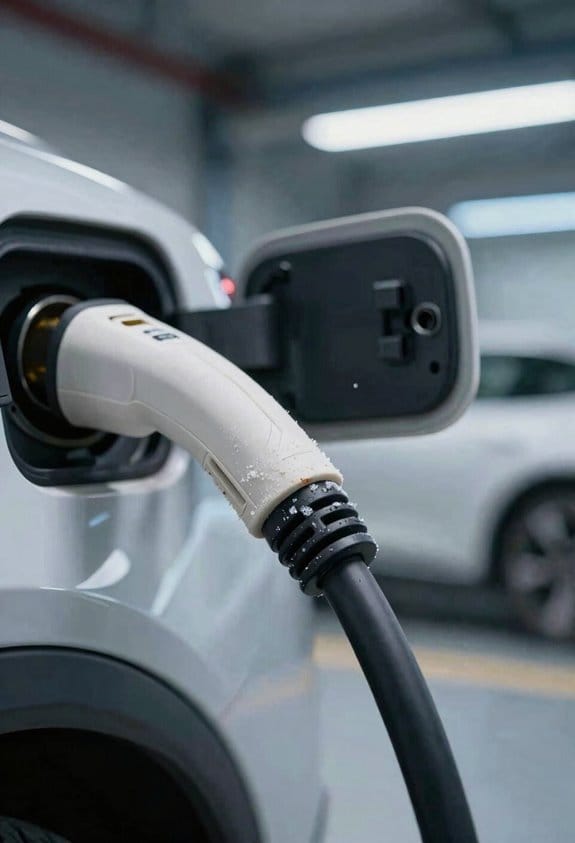
Ever had a charger that seems fine, then suddenly quits mid‑charge? That jittery feeling usually starts with something you can see—cracks, fraying, loose plugs, or even a little ice build‑up. A quick once can save you a lot of hassle.
Cracks & Fraying
Run your fingers along the whole length of the cable. If you feel a rough edge or spot a thin, worn‑out spot, that’s a red flag. Those weak spots can snap the next time you yank the cord.
Loose Plugs
Give the connector a gentle wiggle. If it shifts more than a millimeter, the plug’s probably loose. A shaky connection can cause intermittent power and might even spark.
Ice Blockages
Check the plug housing for any frost or ice crystals, Especially in colder rooms, moisture can freeze and block the contacts. Clear it away before you plug anything in.
Connector Corrosion
Look at the metal contacts. Green or white residue means corrosion has set in. A dry cloth can wipe it off, but if it keeps coming back, consider swapping the connector.
Fair warning: ignoring these signs can lead to charging interruptions or even damage to your device. Try this: after you’ve inspected everything, give the cable a gentle bend test—if it feels sturdy, you’re good to go.
Address any issue before you plug in to avoid charging interruptions.
Got any other charger quirks you’ve dealt with? Let’s hear them.
Recommended Products

【Top-Flight Performance 】The 51.2V 100Ah liFePO4 battery is manufactured by 16Pcs Automotive Grade A grade prismatic cells with higher energy density, more stable performance & greater power. And has a compact 5.12kWh energy, which is equivalent to 4pcs 12V 100Ah LiFePO4 batteries in 4S (or even 8pcs 12V 100Ah AGM batteries in 8S). Fully compliant with the UL1973 safety standard and certified by Intertek ETL for reliable safe operation.

Limited-Time Perks: E10 Metal Pad, Up to 12-Month 0% APR

[Get Up to a 30% Tax Credit] You may be eligible for the Residential Clean Energy Credit on qualified solar electric property costs. Check with your utility provider to confirm your eligibility and understand the requirements for the program.
Quick Fixes for Common EV Cable Damage
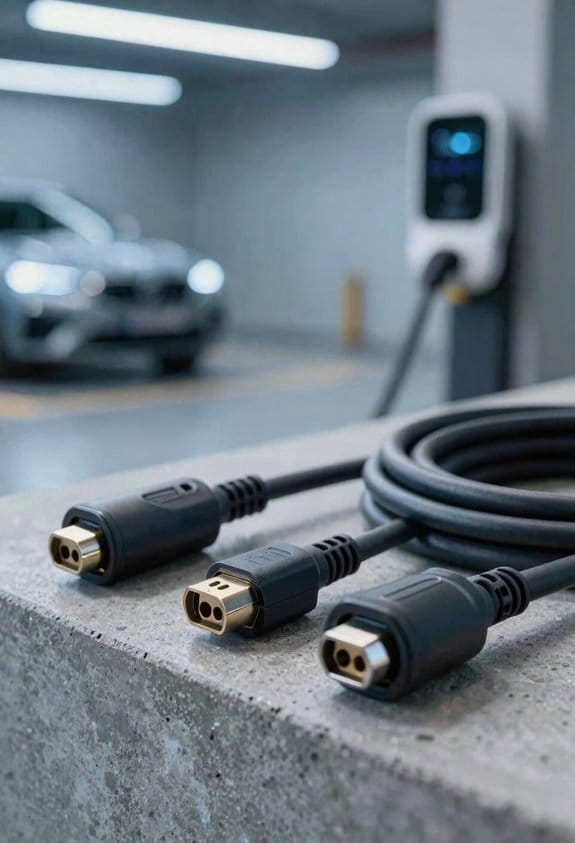
Ever noticed a cracked sheath, a frayed end, or a loose plug on your EV cable and thought you’d have to buy a brand‑new one? You can actually patch it up right there, right now, with a few simple steps and a portable repair kit.
First, give the spot a quick clean. A dry cloth or a little bit of rubbing alcohol does the trick. Then, wrap the crack with two layers of temporary tape, pressing firmly so it sticks. If the end is frayed, trim off the loose fibers before you tape over it.
Worth knowing: the heat‑shrink sleeve that comes with most repair kits gives a tighter seal than tape alone. Slip the sleeve over the damaged part, then heat it gently until it shrinks snugly around the cable. Let it cool for a few seconds, then give the connection a quick test before you start charging.
These fixes get you back on the road fast and keep a sudden shutdown from catching you off guard. Just keep an eye on the cable—if the damage spreads or the charging stays unstable, it’s time to replace the whole thing.
Try this:
- Clean the area.
- Wrap the crack with two layers of temporary tape.
- Trim any frayed fibers, then seal with tape.
- Use the portable repair kit’s heat‑shrink sleeve for a tighter seal.
- Apply the sleeve, then heat it gently.
- Test the connection before charging.
Your EV cable will work fine for a while, but plan on swapping it out soon if the problem gets worse. Ready to give it a quick fix and keep charging?
Recommended Products

WIDE COMPATIBILITY: Supports Li-ion, LiFePO4, and LTO battery types with flexible series configuration from 2S to 24S for versatile battery pack repair and analysis

【Trusted Brand】Autel has been making automotive intelligent diagnostic, inspection, and analysis products since 2004. The MaxiCharger AC Home was developed over 2 years from a full team of designers and engineers to bring you the safest, smartest, and one of the best looking chargers on the market.
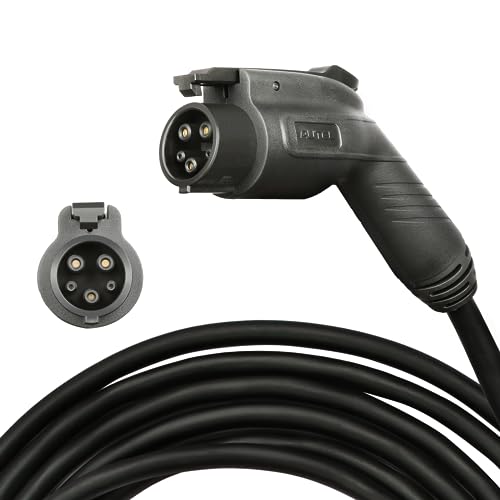
【Durability】 Autel level 2 charger cable uses high quality materials to make the charging cable sturdy and durable,capable of withstanding prolonged use and frequent plugging and unplugging without easily breaking or damaging.
Why Thieves Target Your Cable and How to Deter Them
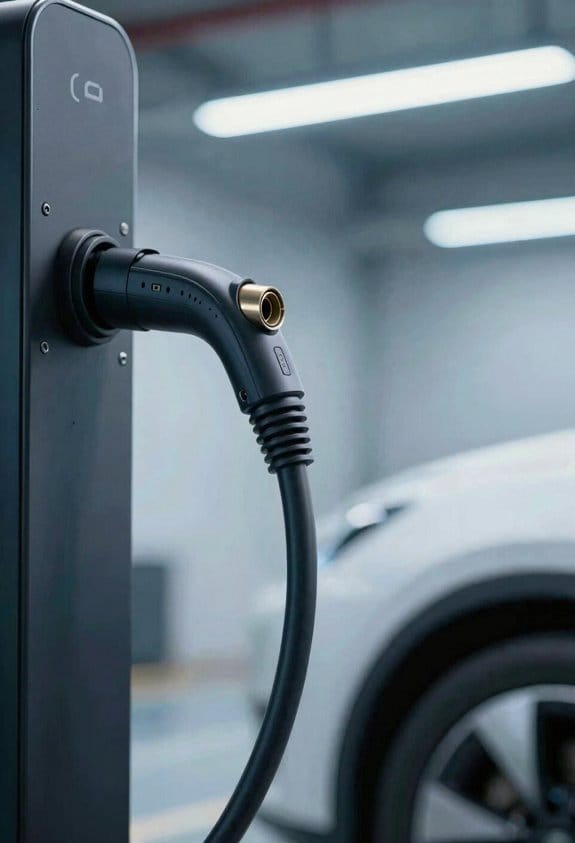
Ever noticed how a cheap‑looking EV charging cable can disappear in a flash? It’s not magic—thieves know copper’s worth and see your cable as an easy grab. You might think it’s safe to leave it out, but the resale market tells a different story. Below are a few practical steps you can take to keep your gear out of the wrong hands.
Lock it down – A sturdy cable lock can keep the cord attached to your car or a fixed post. It’s a small hassle that makes a big difference.
Store it smart – When you’re not charging, tuck the cable inside a locked compartment. That way, it’s out of sight and out of reach.
Choose a tougher model – Some cables come with a metal braid that resists cutting. It’s a bit pricier, but the extra protection often pays for itself.
Frankly, a few simple habits can cut the theft risk dramatically. Mark your cable with a unique ID or have it engraved; it makes it harder for thieves to sell and easier for police to trace. If you can, pick charging stations that have surveillance cameras—those lenses are a strong deterrent.
- Report any theft to the police right away; fines and jail time are real possibilities for the culprits.
- Keep a record of the cable’s serial number and any identifying marks.
Worth knowing: If you’re at a public spot, keep an eye on the cable while you’re away. A quick glance can stop a thief before they even start.
These steps aren’t fancy—just common sense that saves you money and hassle. Have you tried any of these tricks yet?
How Cable Length and Compatibility Influence Charging Success
Ever tried to plug your EV in a tight spot and realized the cable just isn’t long enough? It’s a small hassle that can turn a quick top‑up into a frustrating scramble. The right cable length and the proper plug type are the unsung heroes of a smooth charge.
First, walk around your car and note the distance to the nearest outlet. You’ll want a cable that’s just a little longer than that—about a foot or two of slack is perfect. Anything shorter forces you to stretch and can damage the cord or the port. Anything too long not only creates a tripping hazard but can also cause a slight voltage drop, which means slower charging.
Next, double‑check the connector. Your vehicle might use CCS, CHAdeMO, or a Tesla‑specific plug, and the charging station needs to match. A mismatched plug can lead to intermittent connections or a sluggish charge rate. It’s worth taking a quick look at the port before you start a long session.
Tips for success
- Measure the distance from your car to the outlet.
- Choose a cable that’s within 1‑2 feet of that measurement.
- Confirm the plug type (CCS, CHAdeMO, Tesla) matches both your vehicle and the station.
- Give the connection a quick test before you settle in for a long charge.
Fair warning: a cable that’s too long can sag and pull on the connector, especially if you park on a slope. Keep it tidy and avoid any stress on the plug.
Try this: after you’ve measured, lay the cable on the ground and see if it reaches without a tight pull. If it does, you’re good to go. If not, grab a shorter one before you head out.
Honestly, taking a minute to verify length and compatibility saves you from a lot of hassle later. It’s a tiny step that makes your charging routine feel a lot smoother.
Recommended Products

Color: Bright yellow for high visibility and easy identification in your workspace

Lightning-Fast Charging Power – Deliver up to 48 Amps and 11.5kW of power for rapid Level 2 charging—get EVs back on the road faster than ever.

INSTALL WITH CONFIDENCE: The Enphase HCS-40 EV Charger, formerly known as ClipperCreek, delivers award-winning durability and reliability. Installation is quick and straightforward—just connect it to a dedicated 40 Amp circuit by any licensed electrician.
Pick Cut‑Resistant, Long‑Lasting EV Cables for 2026
Ever had that moment when you’re about to plug in your EV and the cable looks like it’s seen better days? It’s frustrating, especially when you’ve invested in a good car and you want the charging gear to last. I’ve been hunting for a cable that won’t fall apart after a few months, and I’ve learned a few things that might help you avoid the same hassle.
What to check:
- Material – reinforced polymer, stainless‑steel braid, or Kevlar weave.
- Locking – smart locking connector that clicks into place.
- Length – choose 5‑10 m for home use, longer only if needed.
- Connector type – match vehicle and station.
- Warranty – at least 2 years for peace of mind.
Frankly, the material makes the biggest difference. A reinforced polymer shell feels solid, but a stainless‑steel braid adds a layer of protection that can stop a stray knife or a clumsy tug. Some brands even weave Kevlar into the cable, which feels like you’re getting a mini‑shield for your charger. When the outer layer is tough, the inner wires stay safe, and you won’t have to replace the whole thing after a few knocks.
Here’s the trick: look for a smart locking feature. It’s not just a fancy click; it actually keeps the plug from wobbling loose and can deter someone from trying to yank it out. The lock engages when you push the connector in, and you have to press a release button to pull it out. That little extra step can save you from accidental unplugging and makes it harder for a thief to snatch the cable.
Worth knowing: length matters for convenience. For most home garages, a 5‑meter cable gives you enough reach without creating a tangled mess. If you have a larger driveway or a shared parking spot, a 10‑meter option might be worth the extra cost. Just remember, longer cables can be a bit heavier, so make sure you can handle the weight when you’re moving it around.
When you’re picking a brand, check if they publish cut‑resistance test results. A reputable maker will show you how the cable performed under a knife or a blade, and that transparency tells you they stand behind their product. Also, a solid warranty—at least two years—means the company believes the cable will hold up over time.
So, what’s the bottom line? Choose a cable with a strong outer material, a reliable smart lock, the a length that fits your space, and don’t forget to verify the warranty. You’ll end up with a charger that feels as sturdy as your car.
Ready to give your EV setup the upgrade it deserves?
Recommended Products

Sturdy Steel Construction: Made of 1.5 mm cold-rolled steel, precision cut and welded. Our electrical enclosures got CE, ROHS certificates, have stronger wear resistance, keep your equipment is well protected in harsh environments.

EV Charger Holder: MECMO EV charger cable wall mount holder compatible with most elctronic vehicles or PHEV with SAE J1772 (type 1) connectors, it is a perfect J1772 Holder for your EV Charger;

Flush Mount Power Outlet: Flush mount receptacle feature a heavy gauge galvanized steel mounting strap for corrosion resistance. Fits in BOTH single and 2-Gang box styles. Flush receptacles are completely ready-to-wire, shorten installation time significantly.
Maintenance Checklist to Prevent Downtime and Extend Cable Life
Ever had an EV charger that suddenly stopped working and left you stranded at a gas station? It’s a hassle you can avoid with a quick, regular check‑up.
Visual check – Look for cracks, fraying, or exposed wires.
Plug test – Make sure the connector clicks firmly and no pins are bent.
Flex test – Bend the cable gently; watch for stiff spots.
Storage practices matter too:
- Coil the cable loosely, avoiding sharp bends.
- Keep it in a dry, temperature‑stable place.
- Use a protective sleeve or bag.
Additional steps:
- Clean the plug with a dry cloth.
- Rotate the cable position when stored to prevent wear in one spot.
Frankly, a little attention now saves you a lot of downtime later. Try this: set a reminder on your phone to run through the checklist once a month. Your charger will stay reliable, and you’ll keep your schedule on track.
Got any other tips that helped you keep your gear in shape? Let’s hear them!
Frequently Asked Questions
Do EV Charging Cables Need Different Care in Extreme Cold Versus Heat?
We say our cables are like travelers: in cold storage they stiffen, so we wrap them in insulated sleeves; during heat cycling they expand, so we check connectors often, preventing cracks.
Can I Use a Home‑Grade Cable on a Public Fast‑Charging Station Safely?
We recommend using a home‑grade cable only on compatible public‑grade stations; otherwise safety mismatch and connector compatibility issues can cause failures, overheating, or damage, so stick to approved fast‑charging cables.
What Warranty Options Cover Cable Theft or Vandalism?
We’ve got you covered: insurance add‑ons and locksmith partnerships can handle cable theft or vandalism. Think of it as a safety net, ensuring you’re not left stranded when trouble strikes.
Are There Certifications to Look for When Buying a Cut‑Resistant Cable?
We recommend checking for UL certification and Kevlar reinforcement when you choose a cut‑resistant cable, because those standards guarantee fire safety compliance and added tensile strength that protect against theft and damage.
How Often Should I Replace a Cable That Shows Minor Wear?
We recommend inspecting frequency monthly and replacing timing as soon as minor wear appears—typically every three to six months, depending on usage intensity and environmental exposure, to avoid charging failures.